Merge Master Non-Destructive Mesh Adhesion for Blender 5.0+
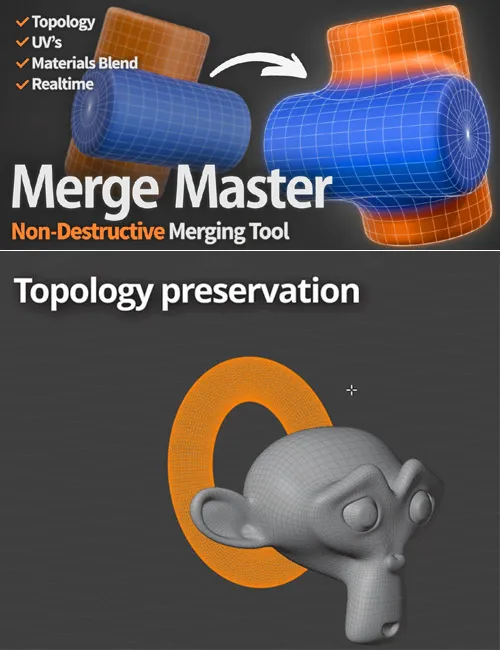
Fusing two separate objects into one continuous surface has always meant booleans, remesh, shrinkwrap or manual sculpting, all destructive and all committed. Merge Master is the first tool that handles this blending live, with just a few clicks, and never alters your source meshes.
Pick two meshes, hit Activate (or press Ctrl+Shift+M), and one fuses onto the surface of the other with a clean adhesion between them. The whole process stays live and reversible.
Merge Master shines for:
- Product visualization and design concepts
- Hard-surface and organic concepting
- Look development, renders, and stills
- Anyone who wants smooth, controllable adhesions without committing to destructive edits
*If you are looking for game-ready assets, keep in mind that Merge Master needs a sufficiently subdivided mesh, and when you bake the result that subdivision gets applied, so the final mesh density will be high. Please watch the youtube tutorial first to understand if Merge Master fits your workflow.
-Real-time blending. Adjustments update as you move the sliders, even on dense meshes. You see exactly what you're getting before committing to anything: no setup steps, no precomputation, no waiting between tweaks.
-Topology preservation. Your original topology stays untouched throughout. Vertex count, edges, faces and mesh structure are all preserved exactly as you built them. You can keep editing A while the merge is active, and the blend updates live without altering a single vertex of the source mesh.
-UVs preserved. UV maps stay exactly as you authored them, even while the blend is running and Blend Materials is active. The merge never rewrites, shifts or modifies UV data, so you can use the same UVs for texturing, baking or downstream work without disruption.
-Live material blending (optional). Creates a texture transition between A's material and B's material across the merge zone, with independent intensity per side so you control how far each one bleeds in. Refresh manually, or enable Auto Refresh to update on idle.
-Single-slider workflow. Global Merge does 90% of the work. It scales Strength, Radius and Normals together proportionally in one motion. The individual sliders are there when you need fine control, and they break free from Global Merge the moment you touch them.
-Boolean operations Optional. When enabled, Object A is cut against Object B so the finalized mesh carries no hidden interior geometry. It is very useful for 3d rpinting purposes.
-Multi-mesh adhesion Blend as many objects as you want onto the same target surface. Just create one adhesion per object, all sharing the same Object B, and a single Object B can receive as many objects as you like. Chaining also works live with no baking needed: you can merge a new object onto an object that is already merged onto something else, since that object can act as the target for the next adhesion. The only rule is that each adhesion has one target at a time, so each object you adhere points to a single Object B.
And much more
-Custom falloff curve. Four presets cover most cases (Smooth, Linear, Sharp, Sphere), and a custom curve editor lets you draw your own profile when none of them fit (remember to refresh the normals with it). The curve updates the blend live.
-Subdivision quality. Built-in subdivision control with two modes:
- Simple: always works, on any mesh, with no extra configuration. The result isn't mathematically 100% accurate, but it's clean and visually flawless in the vast majority of cases. This is the default.
- Advanced: produces a mathematically correct subdivided adhesion. To deliver that, it may require higher polygonal density on Object B.
-Per-object settings. Multiple objects can merge onto the same target B independently. Each stores its own configuration directly on the object, so several meshes can blend onto one body, each with different strength, radius and falloff.
-Bake to Mesh. Generates the final joined geometry and applies the adhesion permanently. An optional backup of the original setup can be saved into a dedicated collection in case you want to revisit it later.
-Bake for Cycles. Joins the two meshes and adds a Bevel node to the material that smooths the merge boundary at render time, compensating for how Cycles renders the blended normals at the contact zone (more on this below).
-Full reversibility. Remove Setup at any moment. Object A returns to its exact pre-merge state, same topology, same UVs.
-Keyboard shortcut. Select two objects with A active, press Ctrl+Shift+M, and the merge runs in a single shot, with no panel diving and no manual B picking. The default parameters land you at a clean adhesion immediately, ready to tweak from there.
Blender 5.0+. Tested on the latest version. Eevee, Material Preview and Cycles are all supported. See the renderer-specific notes below.
- Not suitable for glass or refractive materials.
- Existing modifiers are applied on activation. When you click Activate (or use Ctrl+Shift+M), any existing modifiers on both Object A and Object B are applied automatically before the Merge Master stack is built. Make sure your objects are in the state you want before activating.
- Edited Object A in Edit Mode while active? Reassign the vertex group: enter Edit Mode on A, select all geometry (A), then in the Vertex Groups panel find MM_MergeGroup and click Assign.
These are the real edge cases, documented honestly so you can decide if Merge Master fits your workflow before buying.
- Cycles with diffuse / matte materials. Eevee handles the transition natively. It calculates the blended normals at the contact area consistently with the viewport, and renders cleanly with no extra steps. Cycles computes indirect lighting from those normals slightly differently: on flat-lit matte surfaces this isn't a real problem, but on metallic or glossy surfaces the error is more evident. The dedicated solution is Bake for Cycles, which joins the meshes and adds a Bevel node to smooth the contact area at render time. On metallic or glossy surfaces the error practically disappears entirely, since Bake for Cycles was designed specifically for these cases. (A fully native Cycles solution is the headline feature planned for v2.0.)
- Subdivision active together with Blend Materials. Using both at once produces a visual artifact along the edge of the adhesion zone. For now, use Blend Materials without subdivision, or subdivision without Blend Materials, depending on what your shot needs. (Fix planned for v2.0.)
- UV seams on Object B inside the contact area. If Blend Materials is active and Object B has UV seams crossing the adhesion area, they'll show as small texture discontinuities on A's side of the blend. The fix is to re-unwrap B avoiding seams in that region, a one-time UV pass. If you're not using Blend Materials, this doesn't affect you at all.
- Don't push the adhesion parameters too far. Pushing Strength or Radius past certain limits relative to your geometry can create holes or visible artifacts. The 2:1 defaults are tuned to avoid this in most cases. If you need more aggressive values, increase them gradually and watch the result as you go, rather than jumping straight to maximum.
- Apply scale first. Scale not equal to 1 is the #1 cause of unexpected behavior with any non-destructive workflow. Merge Master detects it and offers a one-click fix before activation.
- Defaults are tuned for a reason. The 2:1 Strength-to-Radius ratio produces clean adhesion curvature out of the box. If something looks off, reset to defaults before tweaking individual sliders.
- Clean normals matter. Standard hygiene for any non-destructive workflow. If results look strange, check your normals first.